

I am so fond of little heirloom dresses that have those beautiful little pintucks on them. Those little, almost magical, raised lines to give such an elegant, old-fashioned, and charming look to the garment. Do you love the look of pintucks also? If so, this post, How to Make Heirloom Pintucks, is exactly what you need to get started!
How to Create Pintucks
To practice this technique, you’ll need the following supplies:
Pintuck presser foot – Groove is preference based on the spacing
Twin needles (which size depends on the foot – explained below)
Cotton thread – 2 spools – match the thread to the fabric
Nice scrap fabric – 8″x15″ (I would use the material you are using for whatever project you are doing.)
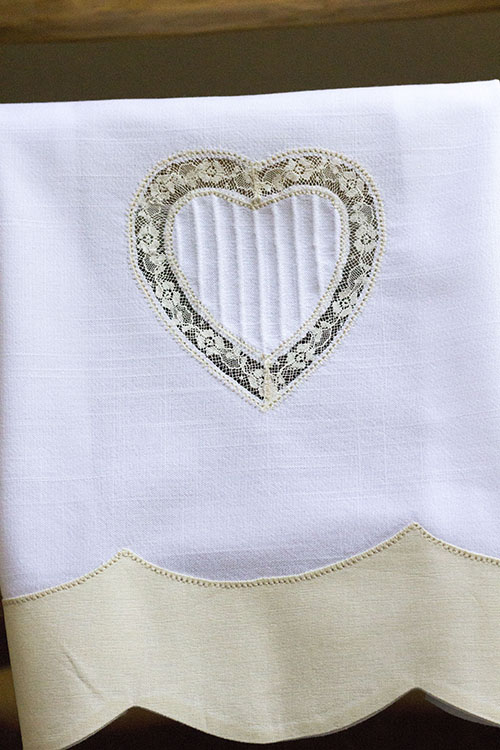
I used linen in this tutorial because I had scraps from the Tea Towel project I show at the end of this post.
Heirloom Pintucks for Beginners
The pintuck presser foot is available for most brands of machines. The foot can have 5 grooves, 7 grooves, or 9 grooves. Your brand machine may only have one or two of these available, not all 3. I’m using a 7-groove foot for my Husqvarna.
What are the grooves for in a pintuck foot?
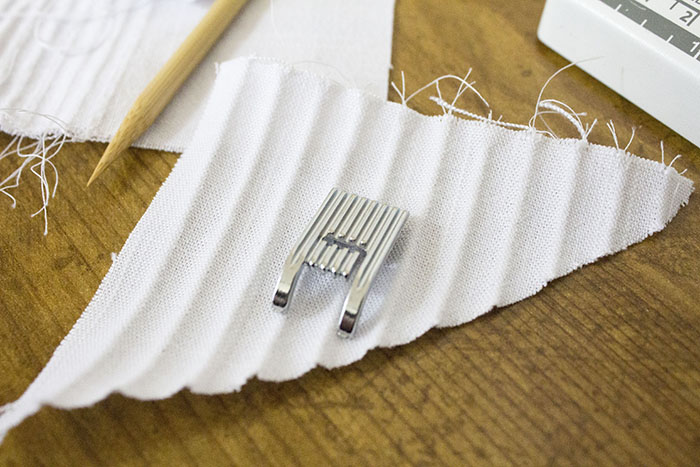
When I first saw the pintuck foot, I thought all those grooves somehow magically produced the pintucks. I was happy to know the spaces in the foot are for previous pintucks made, and to keep them evenly spaced. The number of grooves is based on your preference of spacing for the pintucks.
What Type of Needles are Used to Make Pintucks?
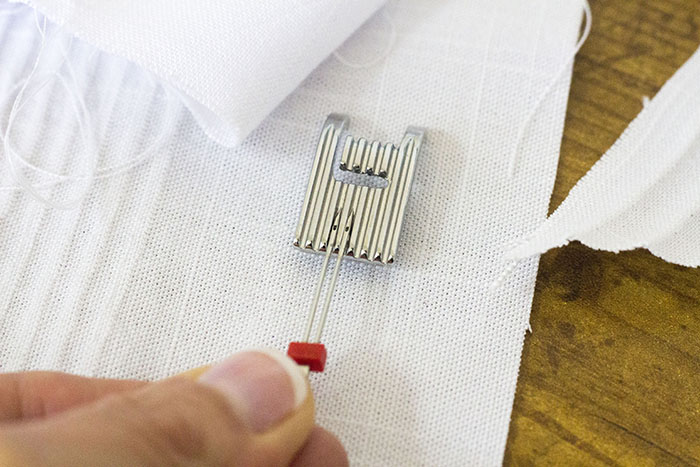
You’ll need to use twin needles to make heirloom pintucks. The needles need to lay in the grooves without stretching out or pulling in, they should lay flat within the grooves. I would start with 1.8/80 on a 7-groove foot. You are looking at a 1.6/80 on a 7-groove foot, and they moved ever slightly but worked for me.
How to Sew Pintucks
Thread your twin needles with a matching thread and attach the pintuck foot. Take a quick peek at your stitch menu and tension settings. Use the regular straight stitch set to 1.0. While you want smaller stitching, the pintucks are not only formed with the stitches, but with the tension of the stitch – otherwise, I would have used a contrasting thread to show the stitches.
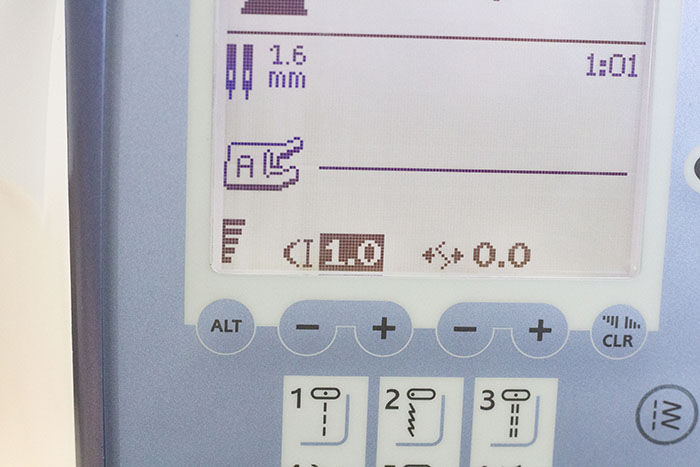
If your machine has the option to select the size of your twin needle, set the size. I have my needles set at 1.6 mm. (See the video) My tension here is set at 4.0. The only reason to increase the tension is if I want to attempt to raise the pintuck just a bit more.
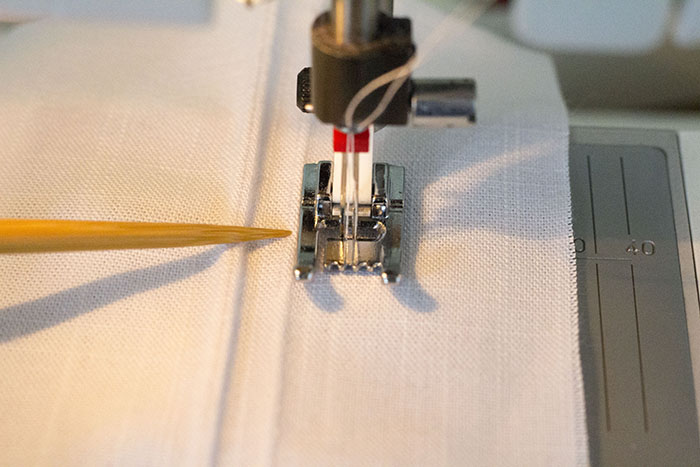
To start, you’ll make your first line of stitching to decide on the spacing you’d like to achieve.
Remember, the needle will always stitch from the middle.
Watching the video at this point is a good idea. Once your first line is stitched, line up the edge of the foot with your first line of stitching. If your line is not raised, increase the tension slightly. Sew another row.
How does your next line look? Is it far enough apart? This is really a preference unless you have a pattern that tells you where to line up the next stitching line. The stitching below is using the edge of the foot. Practice several lines using the edge.
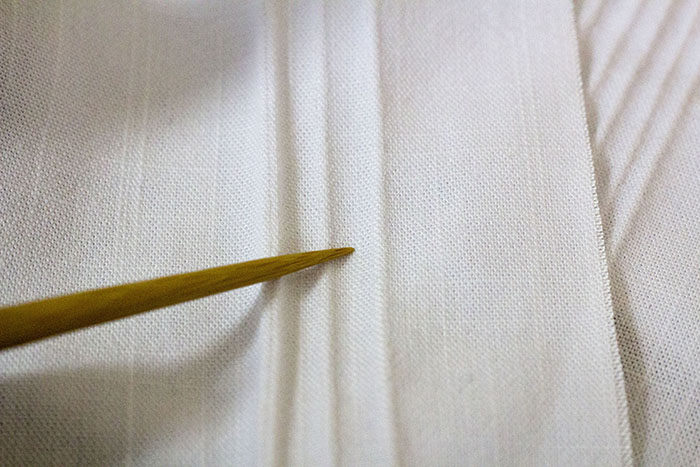
Now, on the next row, skip one groove in the foot, and line up the stitched pintuck in that groove. Stitch.
This is a little closer to the previous stitch. You can see how the foot works now.
Troubleshooting Pintucks
A Flat Pintuck – What Happened?
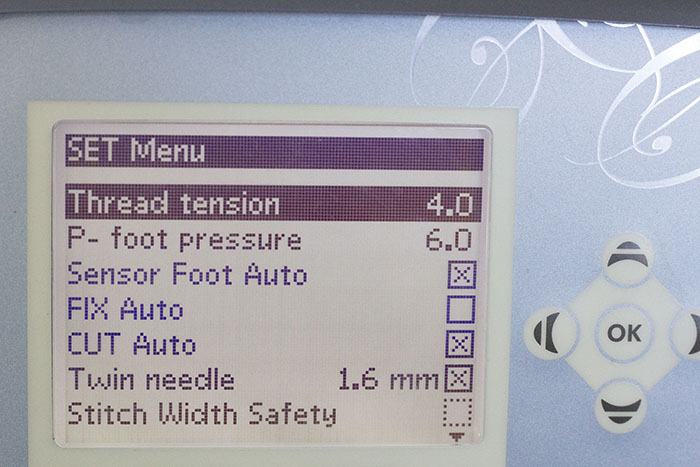
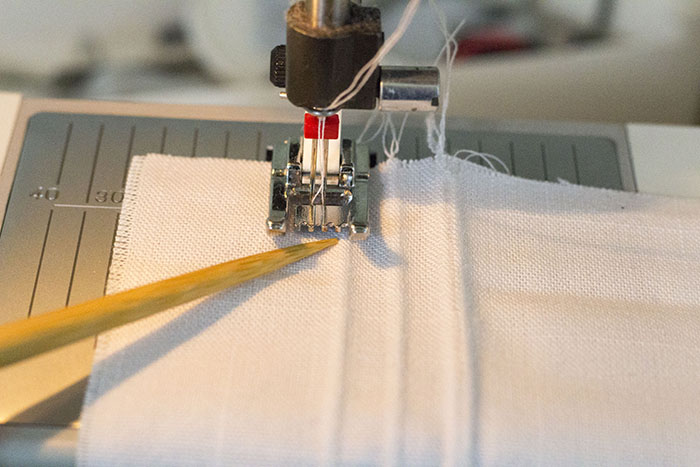
If you just started and your pintuck is flat – did you remember to decrease the stitch length to 1.0? Start there. If it’s still flat, tighten the tension just slightly – just go in small increments. 4.0 to 4.2 etc.
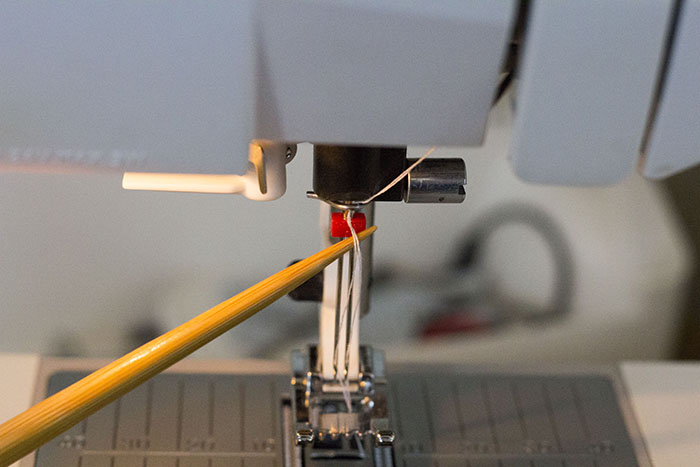
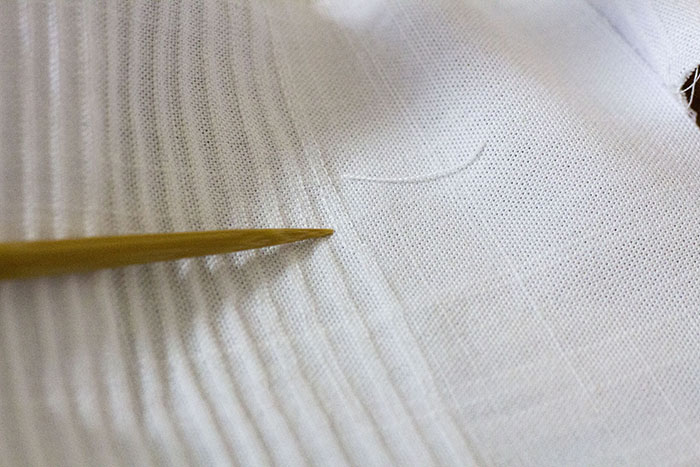
If you’ve been sewing along and all of sudden your pintucks go flat, make sure your settings didn’t revert, after that, there is only one thing I’ve found that dumped my tuck – the thread guide! My pintuck went bone flat after a few rows of successful stitching. Once you get going, it’s hard to pay attention to your double thread in the guide, but it needs to stay there. Watching the pintuck in the foot is the focus because it’s very easy to move off the line. But, make sure to give a quick peek at the thread guide as you sew. I put the thread back in and I was on my way!
What Did I Make With My Pintucks?
This was a class project in my licensing for Martha Pullen, and the pintuck insert was for this pretty tea towel. I have many ideas for the use of this wonderful stitch. I hope you enjoyed the tutorial on how to make the heirloom pintuck stitch.
Theresa
